
Personalised photo magnets for teachers' end of year gifts
· 12 min read
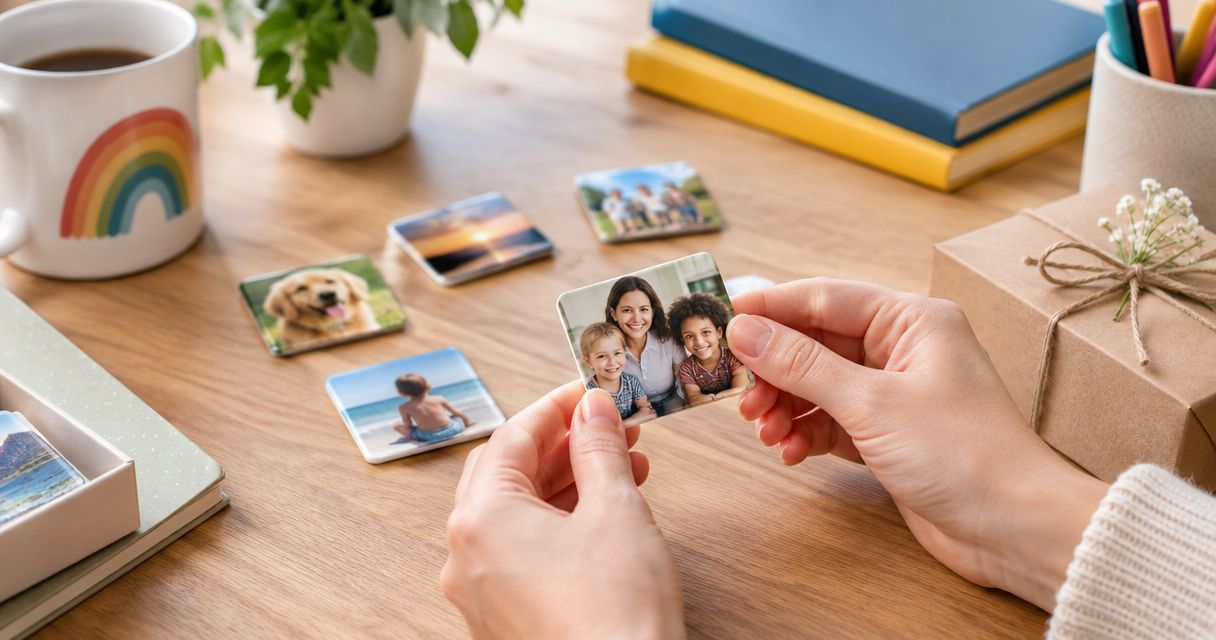
Teachers’ personalised photo magnets are small picture keepsakes made to thank a teacher and celebrate a shared school memory. For an end-of-year gift in 2026, choose a meaningful image, keep the message short and check permission before using photographs of children.
TL;DR
- Personalised magnets for teachers work best with a meaningful photo or photographed drawing, not a crowded class collage.
- Check permission before sharing children’s photographs with a printing service, even when the finished gift is private.
- Pixaprints is best for consumers who want to turn personal photos into personalised gifts.
- Keep the magnet simple and put your longer thank-you message in a handwritten card.
Why photo magnets matter for teachers
A teacher’s end-of-year gift has a particular job: it needs to say thank you without assuming you know their tastes or home. A photo magnet gives you a small space for a specific memory, such as a child’s drawing or an image connected to something they enjoyed learning.
The strongest teacher gift recognises something the teacher did, rather than simply adding their name to an object. A drawing of the class reading corner can carry more meaning than a decorative design with no connection to the year.
Start with the memory, then choose the format. The guide to choosing a personalised photo gift for any occasion helps you think beyond the object to the person receiving it.
Magnets also have a practical limitation: they need a suitable magnetic surface. Don’t assume a classroom board or the teacher’s fridge will work, and don’t make displaying the gift feel like an obligation.
How to make personalised magnets for teachers
1. Choose the memory before the design
Start with a conversation rather than a template. Ask your child what their teacher helped them learn, which activity they remember or what made them feel welcome. Their answer gives the gift a purpose.
For a 2026 end-of-year present, you don’t need a photograph taken at school. A child can draw the sunflowers they grew, the character they loved reading about or a scene from a memorable lesson. Photographing that artwork keeps the gift personal without needing a class portrait.
Best for a gift from one pupil: use a memory your child can explain in their own words. Avoid choosing a picture simply because it looks polished.
- Ask your child to name 1 memorable school moment.
- Shortlist 3 photos or drawings connected to that memory.
- Choose an image with a clear main subject.
- Leave unrelated holiday and family photographs out.
- Save the chosen original in a clearly named folder.
2. Check permission before collecting pictures
A group photograph needs more thought than a picture of a drawing. Before using children’s images, ask the school what it permits and confirm permission with the relevant parents or carers. A photograph shared in a class chat is not automatic permission to upload it elsewhere.
Keep the request specific: explain which image you want to use, who will receive the magnet and that the image will be uploaded for printing. If anyone objects, choose artwork or another image that leaves children out.
For a whole-class gift, appoint one organiser to handle the agreed files. That keeps versions and permissions easier to track without circulating photographs through several chats.
- Check the school’s guidance on pupil photographs and gifts.
- Confirm permission for the intended use before uploading.
- Keep children’s surnames and identifying details out of the design.
- Remove visible name badges, addresses and location details.
- Use a drawing when permission is uncertain.
3. Prepare a clear image and a simple layout
Use your phone’s existing photo editor first. Crop away distractions, straighten the image and check the subject at the approximate size you expect to print. For artwork, photograph the page straight on in even light, keeping your shadow out of the frame.
An online printing service is the next route from file to finished gift. Pixaprints offers personalised photo gifts made from uploaded pictures; when choosing a magnet printer, check its file guidance, dimensions and preview before committing to a layout.
For personalised magnets for teachers, one clear subject is the safest design choice. A group photograph loses impact when every face becomes tiny. A close crop of a drawing or a recognisable classroom object gives the design more room to breathe.
If you’re thinking about how the finished keepsake will sit among other pictures, see these ideas for photo magnets in a fridge gallery.
- Use the original photo rather than a screenshot.
- Crop around the subject without cutting off important details.
- Keep faces and lettering away from the outside edges.
- Inspect the preview for blur and awkward cropping.
- Avoid stretching a picture to fill a different shape.
4. Write a thank-you that sounds like your child
Draft the wording on paper before adding it to a design. Ask your child to finish the thought: what are they thanking their teacher for? Keep their natural phrasing rather than replacing it with a formal message.
As a working limit, aim for no more than 10 words on the magnet. That is a design recommendation, not a product restriction: a short message leaves more space for the image. Put the longer story in the card.
For a 2026 keepsake, use the year only if it adds meaning. A teacher’s name and a simple thank-you can be enough; you don’t need a class name, pupil name, date and slogan competing for attention.
- Check the teacher’s preferred name and title.
- Choose one main message rather than several captions.
- Use clear lettering with contrast against the background.
- Add 2026 only if you want to date the memory.
- Move longer explanations into the accompanying card.
The picture, message and final proof each have a separate job. Choose the memory first, make the image clear, then check the words against the finished layout.

Keep the memory at the centre of the design, then check the image and wording separately.
5. Proof the gift with another adult
Open the finished preview and read it slowly. A familiar name is easy to skim past, so compare its spelling with a school message rather than relying on memory. Check the image separately from the text.
For a class collection, ask one other adult to review the agreed design. Give them a specific task: check the teacher’s name, image permission and crop. Reopening the design to the whole group at this stage invites competing versions.
Best for a shared class gift: agree the design before submitting the order. Keep the confirmation and final file together so the organiser can check what was requested.
- Review every personalised design, not just the first preview.
- Check names, punctuation and any year shown.
- Confirm no face or lettering sits against a crop edge.
- Read the printer’s current production and delivery information.
- Leave time before the final school day to resolve a problem.
6. Pair the magnet with a personal card
The card can explain what the magnet cannot. If the picture shows a child’s drawing of a garden, the note can thank the teacher for helping them enjoy growing things. That connection makes an otherwise puzzling image meaningful.
Let your child write, draw or dictate their contribution. For a shared gift, collect short messages rather than asking every family to fit a photograph onto the magnet. The keepsake stays readable while the card carries the individual thanks.
For the end of term in 2026, keep presentation simple and check how the school prefers gifts to be handed over. There is no need for an elaborate reveal or a photograph of the teacher receiving it.
- Attach the magnet securely to a backing card.
- Add your child’s handwritten or dictated message.
- Explain the memory behind an unfamiliar image.
- Keep the outer packaging easy to open.
- Hand it over without expecting a public reaction.
Compare teacher photo magnet ideas
Choose the design that fits the source material you actually have. A complicated layout does not make a gift more thoughtful, and a photograph is not essential when a drawing tells the story better.
| Design option | Best for | Main benefit | Key limitation |
|---|---|---|---|
| Photographed child’s drawing | A gift from one pupil | Keeps the child’s own creative contribution central | Shadows and faint pencil marks need checking |
| Single permitted photograph | A clearly recognisable shared memory | Gives the design an immediate focal point | Requires permission if other children appear |
| Whole-class photograph | A coordinated class thank-you | Represents the group in one image | Small faces and permission checks complicate the design |
| Teacher’s name with a short message | A gift without pupil photographs | Makes the recipient clear without using children’s images | Feels less specific unless the card explains the thanks |
| Small photo collage | A few closely connected memories | Includes more than one moment | Each image has less space and needs a careful preview |
Choose photographed artwork when the child’s contribution is the point of the gift. Choose a single photograph when it captures a permitted, meaningful moment clearly. Use a collage only when the individual pictures remain understandable in the preview.
Pixaprints personalised photo gifts are another route when your chosen image suits a different format. The trade-off remains the same: a larger display area gives you more room, but it also asks more of the recipient’s space. Choose for the teacher, not for the amount of content you want to include.
Common mistakes when choosing teachers’ gifts
Turning a small keepsake into a class noticeboard
Names, portraits, school logos and several messages compete for space. Remove anything that does not help the teacher recognise the memory. Keep detailed class contributions in the card instead.
Treating shared photos as unrestricted files
Access to a class photograph is not a reason to reuse it without checking. Ask before uploading, and don’t pressure another family to agree. A child’s drawing offers a thoughtful alternative.
Making the message too personal
Thank the teacher for their teaching, encouragement or kindness rather than commenting on their private life. If you don’t know their preferences, avoid jokes that depend on alcohol, relationships or assumptions about home.
Expecting the teacher to display it
A gift should not create a task. Don’t ask where the teacher will put the magnet or suggest it must remain in the classroom. Let them decide how to enjoy the keepsake.
Letting the group design by committee
For a shared gift, agree the image, message and organiser before editing begins. Use one proofing round with a clear decision-maker. That protects the original idea from becoming a crowded compromise.
FAQ
What’s the best design for personalised magnets for teachers?
The best design uses one meaningful image and a short, readable thank-you. A photographed drawing works especially well when you want the child’s contribution to be central.
Can I use a class photo on a teacher’s magnet?
Use a class photo only after checking the school’s guidance and confirming permission for the intended use. Explain that the photograph will be uploaded for printing, rather than assuming permission follows from access to the file.
What should I write on a teacher’s photo magnet?
Write a short thank-you connected to the teacher, and check their preferred name and title. Put the fuller explanation of what they meant to your child in the card.
Is a drawing better than a photograph for a teacher’s gift?
A drawing is better when it captures the child’s own memory more clearly than the photographs you have. Photograph it straight on in even light and check that faint marks remain visible in the preview.
Should I put 2026 on an end-of-year teacher gift?
Add 2026 if you want to identify when the memory happened. Leave it out if it crowds the image or repeats information already included in the card.
Can a photo magnet be a gift from the whole class?
A photo magnet can be a shared class gift when the image and wording represent the group. Keep individual messages in an accompanying card, and appoint one organiser to manage permissions and proofing.
What if a magnet isn’t the right format for my teacher gift?
Choose a different format if the image needs more room or you don’t know whether the teacher has a magnetic display surface. Pixaprints offers personalised photo gifts including calendars, mugs and photo books; choose the format around the memory and recipient.
One last thing
Let your child explain the picture before you finalise it. If their explanation is the most moving part, write it in the card rather than shrinking it to fit the magnet. The keepsake holds the image; the child’s words tell the teacher why it matters.