
Best photo tiles for stairwell galleries 2026
· 13 min read
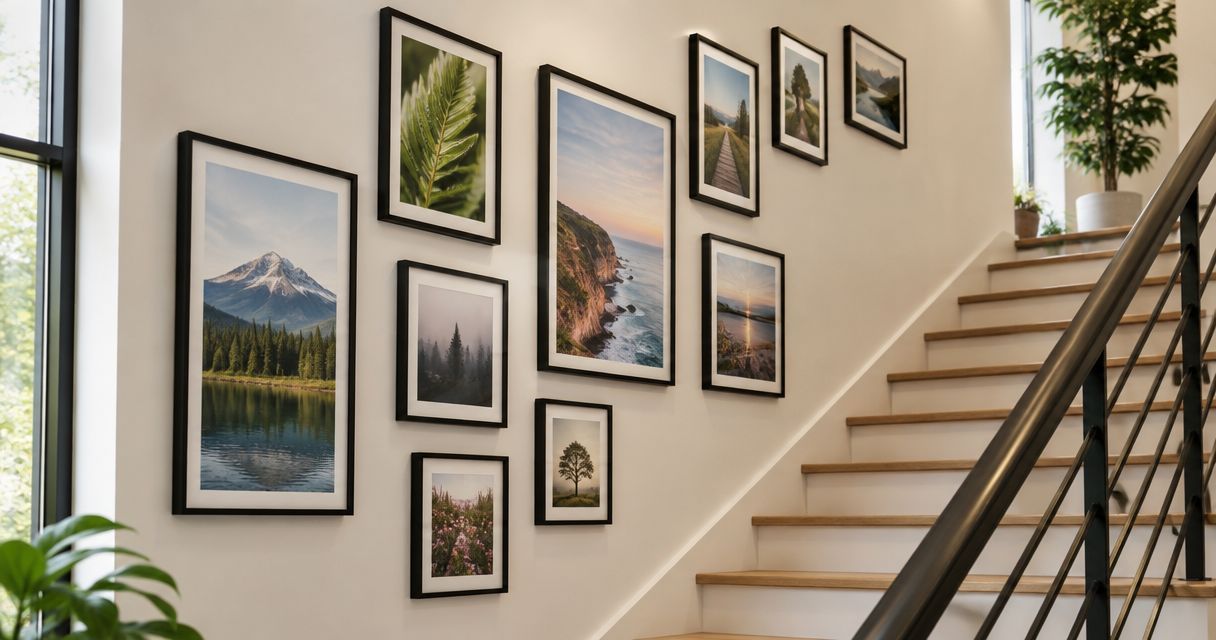
Best overall: a stepped gallery of matching photo tiles. Best for a landing: a compact grid. Best for a small photo collection: a single rising row. This Pixaprints guide compares five ways to arrange photo tiles for walls in a stairwell, with practical checks for cropping, spacing and mounting in 2026.
TL;DR
- Pixaprints recommends stepped photo tiles for walls for straight staircases: the arrangement follows the stairs without splitting individual photographs.
- Choose a compact grid for a landing and a single rising row for a small collection.
- Check the tile supplier’s mounting instructions against your wall surface; removable does not mean suitable for every finish.
- Plan your stairwell gallery with paper templates before ordering, keeping faces clear of square crop edges.
Why this matters
A stairwell gallery has to work from below, from above and while you walk past it. A layout that looks balanced on the floor can feel crowded beside a handrail or disappear behind a turn in the stairs.
Choose the arrangement before you choose the photographs. That tells you which pictures need a square crop, where your strongest image belongs and how much wall to leave empty. If you are also considering a different print format, compare the approach in this guide to canvas prints for stairwell photo galleries.
The recommendations below rank arrangements, not manufacturers. Choose your preferred layout first, then check the specifications of the actual tiles you intend to order.
What makes the best photo tiles for a stairwell?
Use these criteria to shortlist photo tiles for walls in 2026:
- Crop suitability: your chosen tile shape should preserve faces, hands and the details that make the photograph special.
- Wall compatibility: the mounting system must suit your particular paint, plaster or other surface, according to the supplier’s instructions.
- Viewing position: important subjects should remain easy to recognise from the stairs and landing, not just close up.
- Layout flexibility: decide whether you want a finished composition or room to add photographs later.
- Consistent appearance: compare dimensions, depth and finish before mixing tiles from different ranges.
- Practical installation: every planned position must be safely reachable with suitable access equipment.
Do not treat adhesive mounting as proof that a tile is suitable for rented homes. Check the installation and removal instructions, then check any decorating restrictions that apply to your home.
Best stairwell photo tile layouts at a glance
| Rank and arrangement | Best for | Standout feature | Key limitation |
|---|---|---|---|
| 1. Stepped gallery | Straight staircases | Repeated groups follow the rise of the stairs | Needs careful planning at the beginning and end |
| 2. Compact grid | Landings and rectangular wall sections | A clear outer shape keeps the display contained | Does not naturally follow a long diagonal wall |
| 3. Single rising row | A small, edited photo collection | Each photograph gets its own space | Small tiles can look isolated on a broad wall |
| 4. Chapter groups | Family stories and separate occasions | Each cluster holds a distinct set of memories | Too many groups can look disconnected |
| 5. Landing-led gallery | Staircases with a prominent turn | A focal group gives the display a clear destination | Less suitable when there is no visible landing wall |
These options describe composition, not tile materials or fixing systems. The same layout still needs a separate check against the dimensions and mounting requirements of your chosen product.
1. Stepped gallery: best photo tile layout for straight stairs
A stepped gallery uses repeated groups of tiles that rise along the staircase. Keep the tiles themselves level; it is the position of each group that changes, not the angle of the photographs.
This is the strongest default for a long, uninterrupted stair wall. You can give every group a similar shape without forcing the whole display into a horizontal rectangle.
Stepped gallery pros:
- Follows the direction of a straight staircase.
- Gives separate photographs a shared visual rhythm.
- Lets you organise images into repeated, manageable groups.
Stepped gallery cons:
- Awkward wall ends need deliberate treatment.
- Small alignment differences become noticeable across repeated groups.
Best for: a straight flight with a continuous wall beside it.
Start your paper plan with groups of 3 tiles, then adjust the grouping to fit your actual wall. Keep each group internally consistent rather than squeezing an extra photograph into the final gap.
Verdict: Buy matching tiles for a stepped gallery once the full-size template fits.
2. Compact grid: best photo tile layout for landings
A compact grid arranges matching tiles in straight rows and columns. Its clear boundary suits a landing wall, where you can stand back and see the whole collection together.
Choose photographs that remain interesting as a set. A mixture of close portraits and quieter detail shots gives the eye somewhere to rest without changing the geometry.
Compact grid pros:
- Creates a contained display on a rectangular wall.
- Makes equal gaps straightforward to compare.
- Gives every photograph an equally prominent position.
Compact grid cons:
- A rigid outline is less suited to a sloping wall boundary.
- One noticeably different crop or colour treatment can interrupt the set.
Best for: a landing or a clear rectangular section above a hallway.
Try a paper grid of 2 rows before committing to a taller arrangement. Check it with nearby doors fully open so the finished display does not feel squeezed by the surrounding joinery.
Verdict: Buy for a landing; skip the grid if your available space is mainly diagonal.
3. Single rising row: best photo tile layout for a small collection
A single rising row gives each photograph a separate position along the stair wall. It is a good choice when you have a few meaningful pictures and do not want to fill the space simply for the sake of it.
Keep each tile upright and use a consistent relationship between neighbouring positions. The row should feel intentional from both ends of the stairs.
Single rising row pros:
- Keeps attention on individual memories.
- Leaves more visible wall around the photographs.
- Makes a short collection feel complete rather than unfinished.
Single rising row cons:
- Small photographs can feel lost on a wide wall.
- Uneven gaps stand out when there are no surrounding rows.
Best for: an edited collection of portraits or favourite moments.
For your 2026 gallery, choose photographs you would happily display individually. Avoid relying on a tiny detail that only makes sense when you stop and look closely.
Verdict: Buy for a deliberately restrained display; skip if you want a full-wall effect.
4. Chapter groups: best photo tile layout for family stories
Chapter groups divide the gallery into small collections, such as a holiday, a wedding or everyday family life. Each cluster tells its own story while the overall display follows the staircase.
Repeat the same tile shape and internal spacing to connect the groups. You do not need every photograph to share a colour palette when the arrangement supplies the consistency.
Chapter groups pros:
- Keeps photographs from the same occasion together.
- Gives different family memories their own space.
- Lets each cluster have a clear beginning and end.
Chapter groups cons:
- Unrelated group sizes can make the wall feel fragmented.
- Adding photographs later still requires checking the full composition.
Best for: a family collection with several distinct occasions or themes.
Leave a visible break between chapters rather than making those gaps almost the same as the gaps inside a group. The distinction should be clear without needing captions.
Verdict: Buy for storytelling; hold if your photographs do not yet form clear groups.
5. Landing-led gallery: best photo tile layout for turning stairs
A landing-led gallery puts the strongest group on the wall you face as you approach a turn. Supporting tiles along the stairs lead towards that focal point rather than competing with it.
This arrangement suits a staircase where the landing wall is more visible than the side wall. Walk the route before choosing which photograph deserves the central position.
Landing-led gallery pros:
- Gives a turning staircase a clear focal point.
- Lets a favourite portrait anchor the collection.
- Keeps the approach less crowded than the main display.
Landing-led gallery cons:
- Depends on a useful sightline towards the landing.
- An oversized focal group can overwhelm a small wall.
Best for: stairs that turn towards a visible landing wall.
Use one recognisable image at the heart of the arrangement, supported by photographs with simpler backgrounds. Check the view from downstairs as well as from the landing itself.
Verdict: Buy if the landing is your strongest viewing position; skip if it is hidden.
How to plan your stairwell gallery in 2026
Measure the wall
Record the usable wall area, noting handrails, switches, door frames and changes in ceiling height. Measure the tile dimensions you are considering rather than relying on photographs of someone else’s home.
Make paper templates at the actual proposed size. If you are comparing a 20 cm square tile, each template should be 20 cm square; this is a planning example, not a product specification.
Test the layout
Arrange the templates using a temporary method suitable for your wall finish. Start with a trial gap of 5 cm, then adjust it to suit the tile size and the available space; this is a design starting point, not a mounting requirement.
View the arrangement from the bottom step, the turn and the landing. Keep the handrail usable and avoid positions where people will brush against the display.
Check the crops
Preview every photograph in the intended shape. A square crop can remove people at the edges of a wide group photograph, so do not approve the collection from thumbnails alone.
Keep essential details away from the crop boundary. If a picture only works as a wide rectangle, choose another image rather than forcing it into a square.
Confirm the fixing
Read the chosen supplier’s instructions for surface preparation, installation and removal. Check whether any replacement mounting materials are needed if you intend to move tiles later.
Never stretch over a stairwell void or balance on furniture to reach a position. If the planned location is not safely accessible, change the layout or arrange suitable professional help.
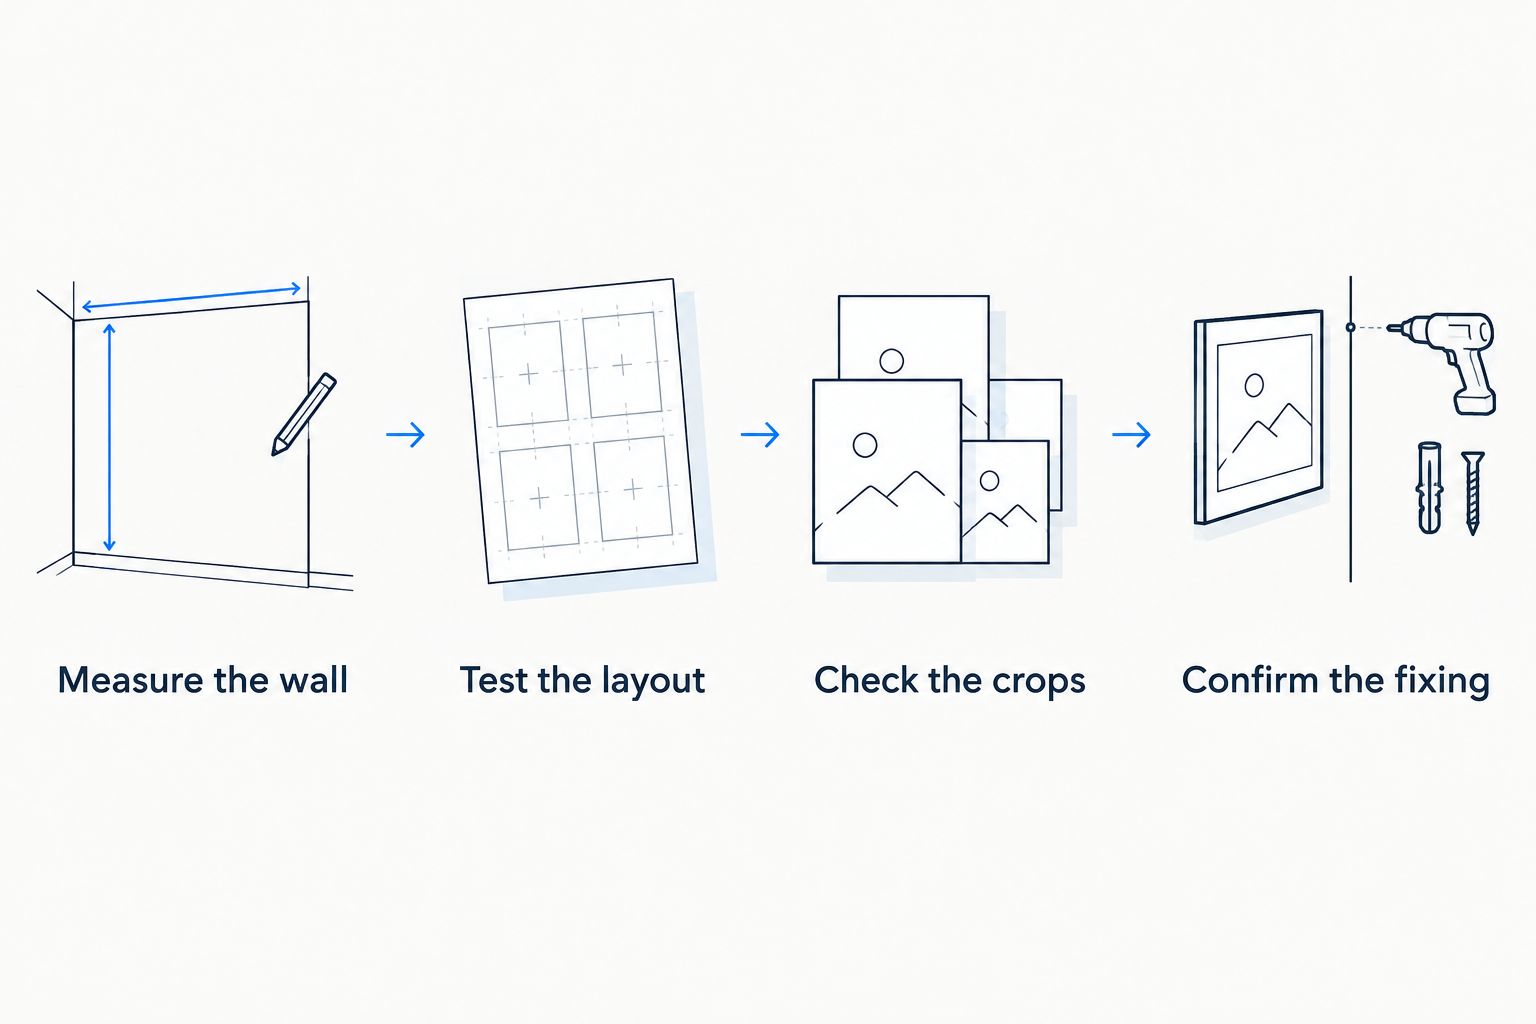
Check the full-size arrangement and every crop before committing to your tiles.
Choose photographs that work together
Start with the memory, then judge the crop. A favourite expression matters more than having every image taken in exactly the same light, but the subject still needs to be clear at the intended viewing distance.
For a calmer 2026 display, repeat a simple visual choice: similar backgrounds, a shared colour treatment or alternating portraits and scenery. Avoid applying heavy filters just to make unrelated photographs match.
Check older scans and pictures received through messaging apps carefully. Use the original file where you have it, and inspect the print preview rather than assuming a sharp-looking phone thumbnail will produce the result you want.
Keep each photograph complete. Splitting a face across separate tiles introduces a different design problem from arranging individual pictures in a gallery.
How the layouts are ranked
The Pixaprints ranking of photo tiles for walls prioritises staircase fit, readable photographs and a layout you can check before installation. The stepped gallery leads because it directly suits a straight stair wall; the other arrangements win for specific spaces or collections.
This is a layout guide, not a hands-on comparison of tile brands. Material, finish, mounting compatibility and removal instructions remain product-specific checks.
Which photo tile layout should you choose?
Choose a stepped gallery if you are undecided and have a straight staircase. Use matching tiles, repeat a simple grouping and approve the whole arrangement with paper templates before ordering.
Choose a compact grid for a landing, a single row for a small collection, chapter groups for separate family stories or a landing-led display for turning stairs. For your 2026 project, let the wall shape settle the choice rather than trying to fit the largest possible collection.
FAQ
What are the best photo tiles for walls beside stairs?
Matching photo tiles in a stepped arrangement are the best default for a straight staircase. Pixaprints recommends choosing the layout first, then checking the actual tile dimensions, crop and mounting requirements.
Should photo tiles follow the angle of the stairs?
The arrangement can rise with the stairs, but each tile should stay level. Move the groups upwards rather than rotating the photographs to match the stair angle.
Can I put photo tiles on textured walls?
Use photo tiles on a textured wall only when the supplier explicitly approves that surface for the mounting system. Do not assume instructions for smooth painted walls apply to textured finishes.
Are removable photo tiles safe for painted walls?
A removable mounting claim is not a guarantee that every painted wall will remain unmarked. Follow the supplier’s surface preparation and removal instructions, and check the condition of your paint first.
How far apart should stairwell photo tiles be?
Use equal gaps within each group and test them with full-size templates. A trial gap of 5 cm is a design starting point, not a universal rule or a fixing specification.
Can I use phone photographs for a photo tile gallery?
You can consider phone photographs if the files suit the chosen print size and crop. Use the original image where possible and inspect the supplier’s preview for lost details or quality warnings.
Should I choose a grid or a stepped photo tile gallery?
Choose a grid for a rectangular landing wall and a stepped gallery for a long wall beside straight stairs. Test both with paper templates if your staircase has elements of each.
One last thing
The best stairwell photograph is not always your most detailed one. A clear expression or recognisable silhouette can communicate more while you are walking past than a busy group scene.
Before you order, look at your chosen pictures from across the room. If the memory gets lost at a glance, save that photograph for an album and give the wall position to a clearer image.