
Can you print a low-resolution photo as a large canvas?
· 12 min read
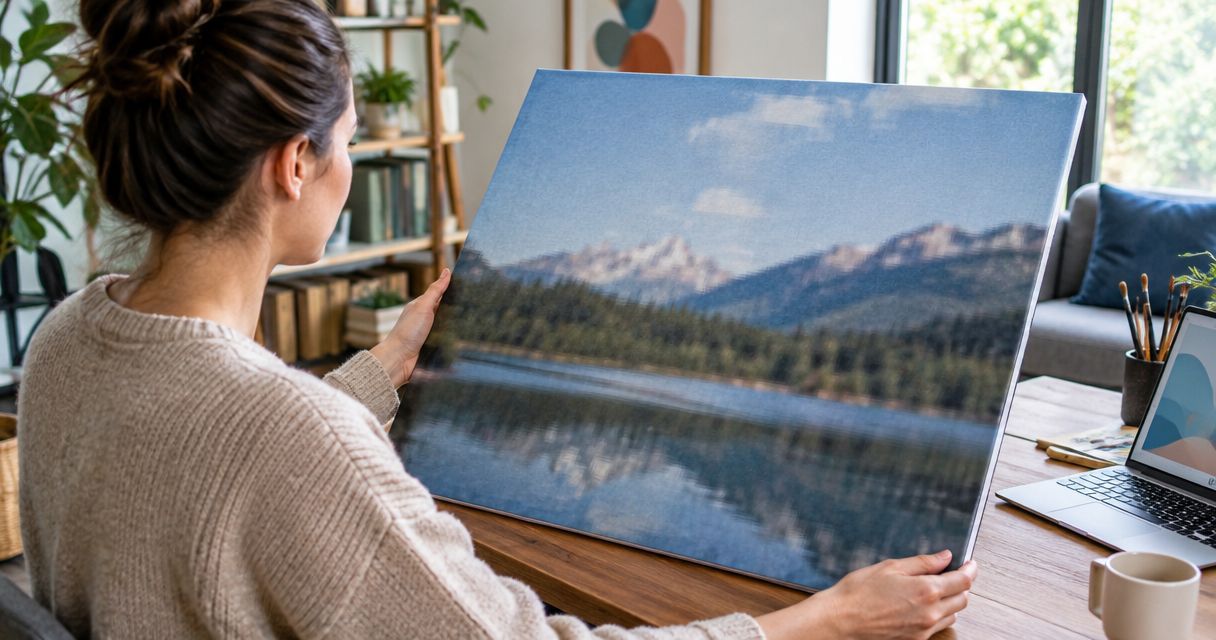
Yes, you can print a low-resolution photo as a large canvas, but enlargement spreads the available detail over a bigger surface, so the result looks softer. Canvas texture and viewing distance affect how noticeable that softness is; neither restores missing detail. Before ordering, check the original file, the final crop and how closely people will view the canvas.
TL;DR
- Can you print low resolution photo on canvas? Yes, but enlargement cannot restore detail missing from the original.
- For Pixaprints canvas printing, start with the original photo rather than a screenshot or downloaded preview.
- Calculate pixels per inch after cropping; changing the resolution label alone does not improve photo quality.
- Choose a smaller canvas when recognisable faces matter more than filling a large wall.
Can you print a low-resolution photo as a large canvas?
Yes—but a printable file is not automatically a sharp-looking print. A photograph can contain enough information to show a lovely expression or a recognisable landscape while still lacking the detail needed for close inspection at a large size.
Start by separating your wall-space decision from your image-quality decision. The guide to choosing the right canvas print size for your wall addresses the display; your file dimensions determine how much image information you have to fill it.
For a canvas project in 2026, follow this sequence:
- Find the original. Look for the camera file or full-resolution download, not a screenshot.
- Check the pixels. Read the image's width and height in its file information.
- Choose the crop. Keep the part of the picture you actually want to print.
- Assess the enlargement. Calculate the pixels per inch and inspect faces, edges and texture.
- Match the display. Decide whether the result suits the intended viewing position.
A treasured photograph does not need to be technically perfect to deserve a place on your wall. The aim is to choose a size that respects both the memory and the limitations of the file.
Why this matters
Your phone displays a photograph on a relatively small surface. A large canvas asks the same photograph to cover much more space, making blur, compression and missing detail easier to notice.
That difference matters especially for faces. A soft background can feel atmospheric, but indistinct eyes or a blurred smile can change how a portrait feels.
For your 2026 wall display, decide what matters most: a large decorative image viewed across the room, or a photograph people will walk up to inspect. Choose the print size for the photograph, not just the empty wall.
How do you check whether your photo has enough resolution?
Pixel dimensions tell you how much digital image information the file contains. Print dimensions tell you how far you intend to spread that information. You need both before a resolution figure means anything.
Find the original
Open the photograph's information or properties panel and look for its pixel dimensions. File size alone is not enough: compression and file format affect how much storage an image uses.
Search your camera roll, computer folders, cloud library and any original download supplied by the photographer. If someone sent you the picture, ask for the original file rather than saving another copy from a conversation preview.
Do not assume that the newest copy is the best copy. An older original can contain more usable detail than a recently saved screenshot.
Check the pixels
Pixels per inch, usually shortened to PPI, describes how many image pixels fit into each inch of the print. Divide the image width in pixels by the intended printed width in inches, then repeat for the height.
As a worked example—not a product specification—a photograph measuring 2,400 pixels wide, printed 12 inches wide, provides 200 PPI across that dimension. Print the same file 24 inches wide, and it provides 100 PPI.
These calculations explain enlargement; they are not universal pass-or-fail thresholds. Original sharpness, subject matter, surface texture and viewing distance still affect the result.
Choose the crop
Calculate resolution using the pixels left after cropping. Removing much of the background also removes image information, even if the remaining subject looks bigger on your screen.
For example, a crop measuring 1,200 pixels wide provides 100 PPI when printed 12 inches wide. Enlarging that crop back to the original file dimensions does not recreate the discarded detail.
Keep faces away from any area that will be trimmed or wrapped around an edge. Confirm the actual layout before approving a canvas, rather than assuming every visible pixel will remain on the front.
Assess the enlargement
Look closely at eyes, hair, lettering and contrasting edges. Check for blocky squares, smeared textures and bright outlines around sharpened subjects.
Then step back and judge the whole photograph. Inspecting individual pixels helps you identify defects, but it does not reproduce the experience of seeing a canvas across a room.
This is the practical resolution check for 2026: assess the cropped file at the intended size, rather than trusting a resolution label in isolation.
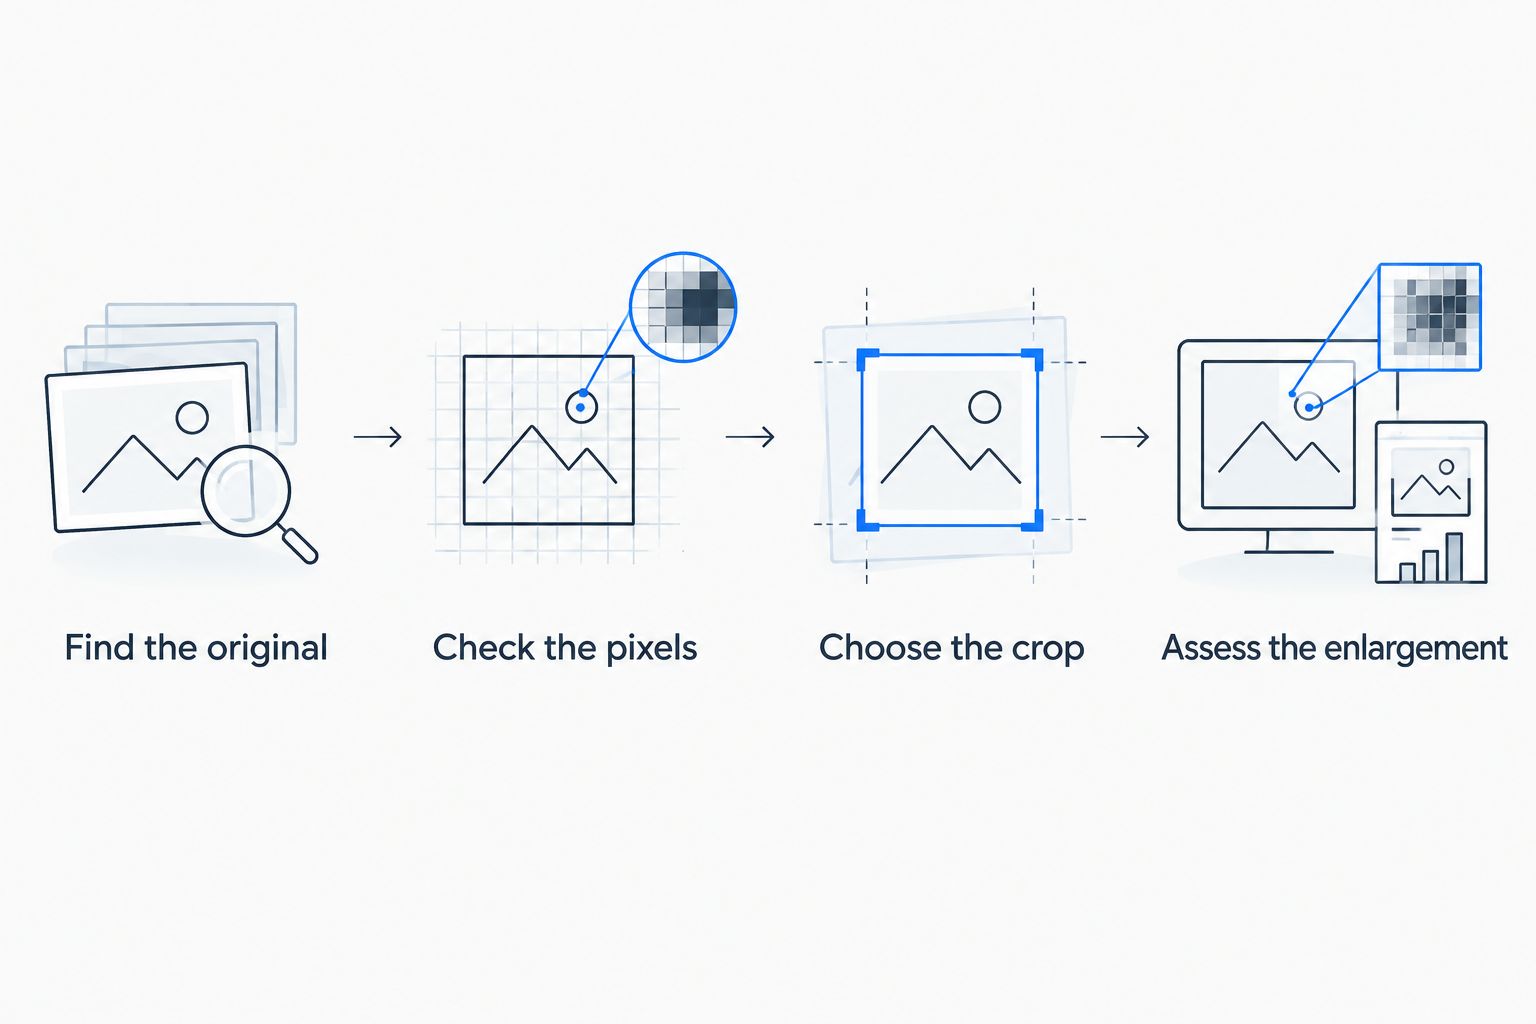
Assess the cropped image, not just the untouched original.
Which approach works best for a low-resolution photo?
Recovering a better original is the strongest starting point. If that is impossible, changing the size or layout is more honest than expecting an editing tool to reconstruct the exact scene.
Each approach below has a useful role and a clear limitation. None guarantees that a small, blurred file will become a detailed large portrait.
| Approach | Best for | Main advantage | Main limitation |
|---|---|---|---|
| Recover the original | Screenshots and reduced copies | Preserves detail already captured | The original might no longer exist |
| Choose a smaller canvas | Close-viewed portraits | Concentrates the available pixels | Covers less wall space |
| Keep a looser crop | Photos with useful surroundings | Retains more of the original image | Makes the subject less dominant |
| Use a collage layout | Several meaningful photographs | Keeps each individual photo smaller | Divides attention between images |
| Enlarge with software | Files needing careful resizing | Can smooth visible pixel edges | Cannot verify or restore missing original detail |
A collage is not automatically the answer. If you place the same weak image in one oversized panel, its resolution problem remains; the benefit comes from keeping each photograph's printed area modest.
Pixaprints canvas printing is best suited to people turning personal photographs into wall art, with the clearest original file as the starting point. The service cannot change what your camera captured, so make the image-quality decision before committing to a large format.
Why does low-resolution canvas quality vary?
There is no single image dimension that guarantees every large canvas will look good. These factors explain why photographs with similar pixel counts can produce different-looking results:
- Original focus. A small, sharply focused image and a larger blurred image have different limitations. Extra pixels do not correct camera movement or missed focus.
- Compression. Reduced copies can show blocks or smearing, particularly around edges and fine textures. Enlargement makes those defects more visible.
- Cropping. A tight crop leaves fewer pixels to cover the intended canvas area. Check the final composition before calculating resolution.
- Subject detail. Lettering, eyelashes and intricate buildings reveal softness differently from skies, water or out-of-focus backgrounds.
- Viewing conditions. Print size, canvas texture and how closely people inspect the image influence their perception of sharpness.
Use these factors together. A distant landscape intended for across-room viewing deserves a different judgement from a close-up portrait beside a reading chair.
Can editing make a low-resolution photo suitable for enlargement?
Editing can improve presentation, but it cannot recover a faithful record of details that were never captured. Brightening a dark face, correcting an unwanted colour cast or trimming a distracting edge is different from reconstructing missing facial detail.
Start with restrained adjustments. Keep an untouched original, work on a copy and compare the result with the source rather than judging the edited version alone.
For a 2026 canvas project, pay particular attention to these changes:
- Sharpening: increases edge contrast, but excessive sharpening creates visible halos.
- Noise reduction: reduces speckling, but strong settings can smear hair and skin texture.
- Resizing: adds pixels through interpolation, but a bigger pixel count is not proof of more captured detail.
- Brightness correction: reveals the image more clearly, but does not fix missed focus.
Avoid repeatedly saving and editing compressed copies. Keep your working version separate and export the final file only after choosing the crop and adjustments.
A small proof print can help you judge a difficult image. Treat it as a check of the actual printed detail, not a promise that a larger version will look equally sharp at close range.
Will canvas texture hide pixelation or prevent fading?
Canvas texture can make some fine defects less conspicuous, but it does not remove pixelation. Distinct blocks, blurred faces and compression artefacts remain part of the image being printed.
Sharpness and colour longevity are also separate questions. Resolution concerns the detail in the starting file; colour fading in canvas prints concerns changes to the printed image over time, so improving one does not solve the other.
Do not choose a large canvas because you expect its texture to disguise every problem. First decide whether the photograph looks pleasing at the intended size, then consider its display position and follow the supplier's care instructions.
That distinction protects a sentimental image from the wrong expectations. A softly detailed photograph can still be meaningful, but canvas is a display surface, not a repair process.
When should you choose a smaller canvas instead?
Choose a smaller canvas when enlargement makes the important part of the photograph hard to read. For a family portrait, that usually means judging the faces before the scenery or decorative background.
A smaller canvas is particularly sensible beside a desk, near a doorway or anywhere people naturally pause close to the picture. You are choosing a more suitable viewing experience, not giving up on the photograph.
Use this final check before ordering:
- Are the people recognisable without relying on your memory of the scene?
- Does the crop preserve the expression or detail you love?
- Are editing artefacts more distracting than the original softness?
- Would a smaller printed image feel more intentional?
- Does the picture suit the actual place where it will hang?
For your Pixaprints canvas project, settle those questions before uploading the final edited copy. Keep the original alongside it so you can return to a less processed version if necessary.
Does changing a photo to 300 DPI improve it?
Changing a photo's label to 300 DPI does not add captured detail. Image resolution for a print is better assessed through pixels per inch at the intended output size; printer dots and image pixels are different things.
If an editor changes the resolution label without resampling, the pixel dimensions remain unchanged. If it resamples, it calculates additional pixels rather than recovering the original scene.
Is a blurry photo the same as a low-resolution photo?
A blurry photo is not necessarily low-resolution. It can contain many pixels but lack sharp detail because of movement, missed focus or processing.
A low-resolution photo contains relatively few pixels for the intended print size. Reducing the print size helps with that limitation, but does not reliably cure blur already recorded in the image.
FAQ
Can you print a low-resolution photo on a large canvas?
Yes, but the image becomes softer as you spread its pixels over a larger surface. Check the original file, final crop and intended viewing position before choosing the size.
How do I know whether my photo will look pixelated on canvas?
Inspect the cropped image for visible blocks, smeared edges and missing facial detail, then calculate its pixels per inch at the intended print size. A screen preview alone does not guarantee the printed result.
Is a phone screenshot good enough for a canvas print?
A screenshot is a weaker starting point than the original photograph because it records the displayed image rather than preserving the full source file. Find the original camera image or full-resolution download whenever possible.
Will increasing the pixel count make my photo sharper?
Increasing the pixel count does not restore missing original detail. Resizing software calculates new pixels, so compare the result carefully for unnatural textures and altered facial features.
Does canvas hide a blurry photograph?
Canvas does not remove blur from a photograph. Its texture affects how fine detail looks, but missed focus and motion blur remain in the printed image.
Should I crop a low-resolution portrait tightly?
Avoid a tight crop if it removes pixels you need for enlargement. Keep enough surrounding space to preserve image information and protect faces from trimming or edge wrapping.
What should I do if the only copy is an old printed photograph?
Scan the original printed photograph rather than photographing a small screen copy. A careful scan preserves the detail present in the print, although it cannot recreate detail the original never contained.
One last thing
The best improvement sometimes happens before you edit anything: ask the person who took the photograph for the original. A version saved for sharing is not necessarily the fullest record of that moment.
Before ordering a canvas in 2026, give that search one final try. A better source file is more valuable than a larger resolution number added afterwards.