
How to scan old family photos for reprinting
· 11 min read
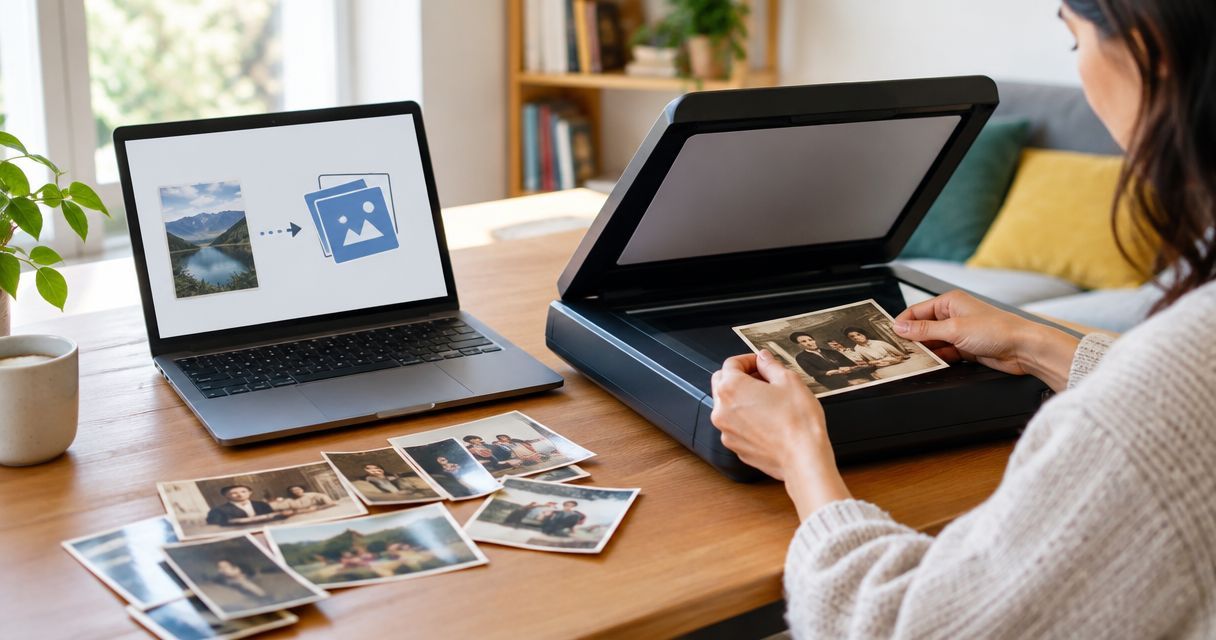
To scan old photos for printing in 2026, use a flatbed scanner, choose a resolution that suits your intended print size, and save an untouched master before making edits. A sharp scan preserves what is in the original; it cannot recover detail that was already blurred, faded away or hidden by glare.
TL;DR
- For how to scan old photos for printing, start with a flatbed scanner and choose resolution before scanning.
- Use 300 ppi for same-size reprints; scan at 600 ppi when doubling the original dimensions.
- Save an untouched master, edit a copy, and check the final crop before ordering.
- Pixaprints suits families turning uploaded photographs into personalised photo gifts.
Why this matters
An old family photograph might be your only copy of a favourite face, a childhood home or a wedding day. Protect the original first, then work on the digital copy. A replacement print is useful; damage caused while trying to make one is not.
If a photograph is flaking, stuck to glass or firmly attached to an album, leave it in place rather than pulling it free. Read the guide to preserving and reprinting treasured family photographs before handling a fragile original.
Decide what you want to make before scanning. A small album reprint needs fewer pixels than an enlargement, while a close crop needs more detail than a reproduction of the whole photograph.
How to scan old photos for printing?
The practical sequence is to prepare the photograph, capture enough detail, save a master and check an edited copy at its intended print size. For your 2026 scanning project, test this process on an ordinary, undamaged photograph before handling anything irreplaceable.
1. Prepare safely
Wash and dry your hands, clear a clean surface and hold photographs by their edges. Keep food, drinks and cleaning sprays away from the work area.
Clean the scanner glass according to the manufacturer's instructions, then let it dry before placing a photograph on it. Do not apply glass cleaner, water or household cleaning products to the photograph itself.
Remove loose surface dust only when the photograph is stable enough to handle. Stop if the image surface lifts, cracks or sheds material; fragile photographs need advice from a photograph conservator.
2. Set resolution
Choose the intended output size before pressing Scan. Resolution should follow the enlargement, not the age of the photograph.
For a same-size reprint, 300 pixels per inch is a useful starting point. For a print twice as wide and twice as tall as the original, scan at 600 ppi to retain 300 ppi at the larger size.
Scanner software often labels this setting dpi, although ppi describes the captured image pixels more precisely. Use the scanner's optical resolution rather than an interpolated setting that adds pixels without capturing extra detail.
3. Scan fully
Place the photograph flat without forcing a curled or damaged print. Preview the scan and include the whole photograph, leaving a little space around its edges so you can straighten it afterwards.
Choose colour capture if you want to preserve sepia tones, paper colour or handwritten marks. Switch off strong automatic sharpening and restoration for the first master; you can experiment with those effects on a separate copy.
4. Save master
Save an untouched version before cropping, retouching or adjusting colour. TIFF supports lossless storage, but produces larger files; a high-quality JPEG is more convenient for sharing and uploading, but uses lossy compression.
Keep the master and your print-ready version separate. Repeatedly opening and saving a JPEG with lossy compression can introduce further changes, so return to the master when making a new edit.
5. Check print
Straighten the image, crop carefully and make gentle tonal adjustments on your working copy. Inspect faces and fine details at full pixel view, then judge the whole picture at approximately its intended physical size.
Check that the final crop still has enough pixels for the reprint. Save the finished file with a clear name that distinguishes it from the untouched scan.
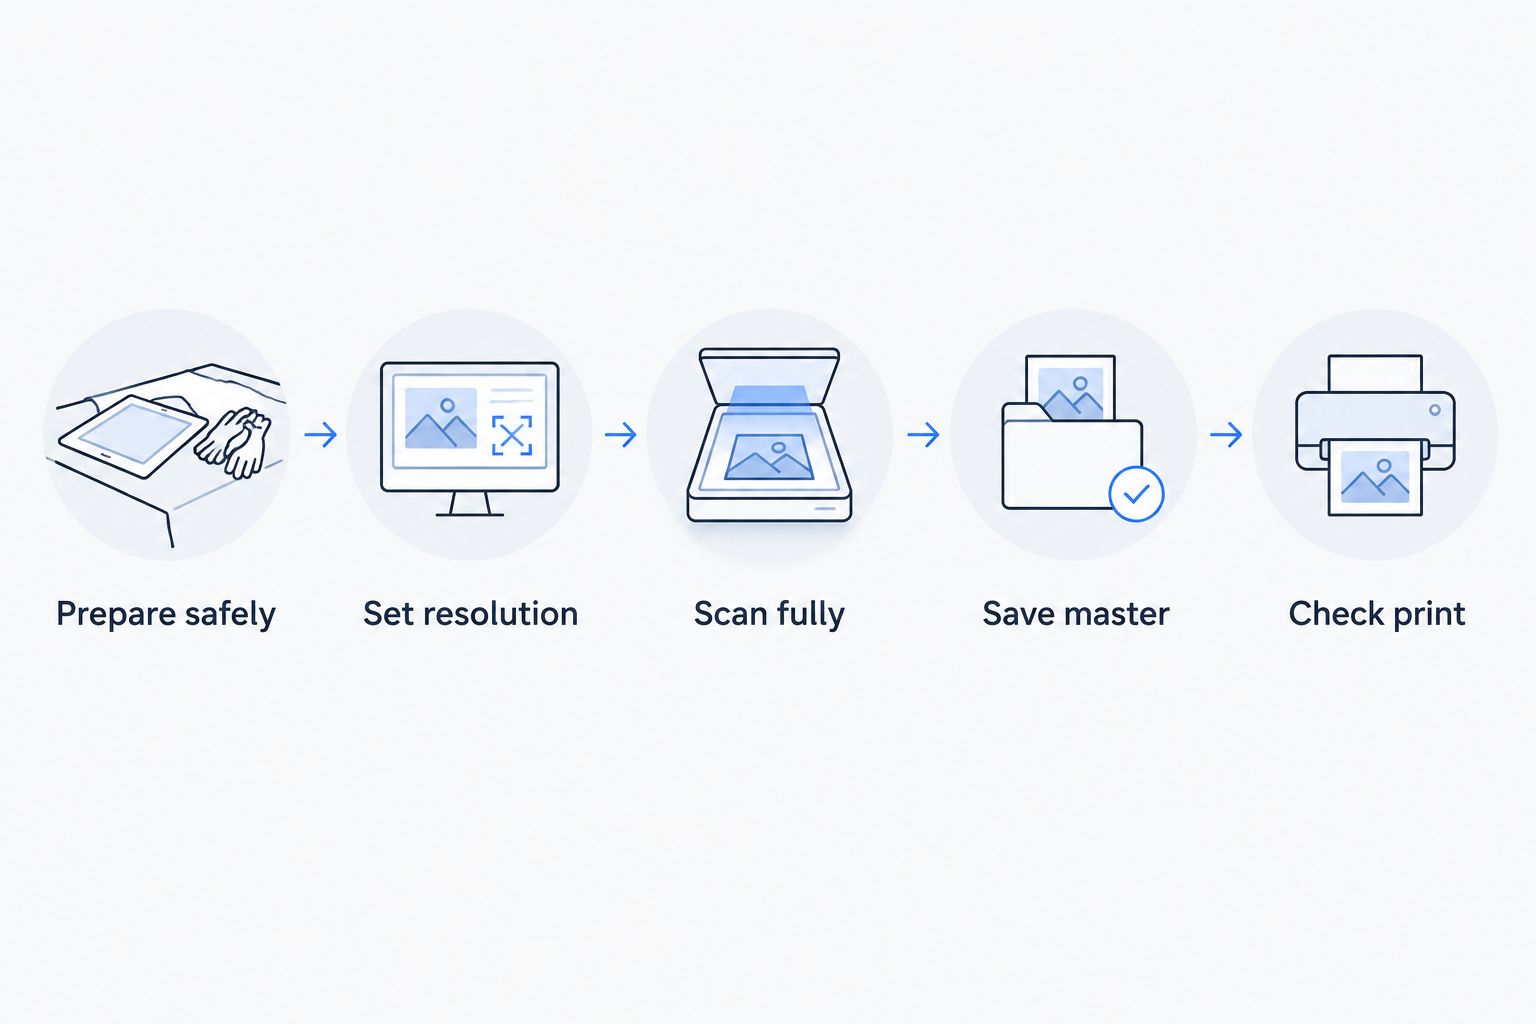
Save the untouched scan before creating your print-ready version.
Same-size reprints: 300 ppi as a starting point
A 300 ppi scan provides 300 pixels for each inch of the original photograph. That is a useful starting point for a same-size photo reprint, provided the source is sharp enough.
For example, a 6 × 4 inch photograph scanned at 300 ppi produces approximately 1,800 × 1,200 pixels. Printing that image at 6 × 4 inches retains 300 ppi before cropping.
The limitation is enlargement. Spread those same pixels across a larger print and the effective resolution falls; crop away part of the image and fewer pixels remain.
Best for: straightforward reprints at the original size. Choose this setting when you know you do not need a substantial enlargement or tight crop.
Double-size enlargements: scan at 600 ppi
A 600 ppi scan captures twice as many pixels along each edge as a 300 ppi scan of the same photograph. That gives you more room for enlargement or cropping, although it does not make an out-of-focus original sharp.
A 6 × 4 inch photograph scanned at 600 ppi produces approximately 3,600 × 2,400 pixels. At 12 × 8 inches, that file supplies 300 ppi before cropping.
This is a useful planning example for a 2026 family-photo project, not a promise that every old print will look crisp at that size. Paper texture, camera focus and damage still affect the result.
Best for: doubling print dimensions or keeping room for later crops. The trade-off is larger files and more visible dust, scratches and paper texture during editing.
Is a flatbed scanner better than a phone?
A flatbed scanner is the better starting point for loose, flat photographs because it controls alignment and lighting. A phone is useful when the photograph cannot safely be placed on scanner glass, but reflections and perspective need more attention.
| Capture method | Best for | Main advantage | Main limitation |
|---|---|---|---|
| Flatbed scanner | Loose, stable photographs | Consistent positioning and even illumination | Unsuitable when placing the original flat risks damage |
| Phone camera | Photographs that must stay in place | Captures an image without removing it from its setting | Glare, shadows and tilted edges can spoil the copy |
| Specialist digitisation service | Fragile or difficult originals | Allows you to discuss handling and capture requirements | Methods and deliverables need checking before handover |
If you use a phone, keep it parallel to the photograph and use soft, even light. Turn off the flash, avoid digital zoom and check that your hands or phone are not casting a shadow across the image.
Photographing through glass is especially difficult because reflections can obscure faces. Do not dismantle a fragile framed photograph simply to remove glare; seek advice if the image appears stuck to the glazing.
Why scan quality varies
The scanner setting is only part of the result. These factors explain why photographs captured at the same resolution can produce very different reprints:
- Original sharpness: a blurred face remains blurred even when you capture more pixels.
- Enlargement: spreading the same pixels over a larger physical area reduces effective print resolution.
- Cropping: isolating one person from a group removes pixels that would otherwise support the print.
- Surface condition: dust, scratches, cracks and textured paper can appear in the scan.
- Capture conditions: dirty scanner glass, uneven lighting and phone-camera glare introduce new distractions.
- Editing and compression: heavy sharpening, repeated JPEG compression and aggressive smoothing can damage detail.
Check the likely cause before scanning again. More resolution will not remove a reflection, and stronger sharpening will not repair a missed focus point.
How do you edit a scan without losing its character?
Start with the smallest correction that solves the problem. Straightening a sloping horizon, removing a distracting dust spot or lifting a dark face can improve a reprint without changing what makes the photograph familiar.
Keep an untouched colour master even if you plan to make a monochrome version. Warm paper, sepia tones and faded colours can be part of the memory rather than faults you need to erase.
Correct tone gently
Adjust brightness and contrast while watching faces, pale clothing and dark jackets. If highlights become blank or shadows turn solid, pull the adjustment back.
Judge colour in context rather than forcing every old photograph to resemble a modern phone image. A faded print can look cleaner without looking newly taken.
Retouch selectively
Remove obvious dust and small scratches on a working copy. Avoid smoothing skin so heavily that expressions, wrinkles and familiar features disappear.
Tools that generate missing facial detail create an interpretation, not recovered evidence. Keep any reconstructed version clearly separate from the faithful scan, particularly when sharing family-history photographs.
Sharpen last
Apply sharpening after deciding the crop and output size. Check edges for bright outlines or an exaggerated grainy appearance, which signal that the effect has gone too far.
For your 2026 reprints, keep the restrained edit alongside any more dramatic restoration. That gives relatives a choice without replacing the original record.
How do you prepare a scanned photo for uploading?
Export a print-ready copy in a file format accepted by the printing service. Check the current upload requirements rather than assuming that an archival TIFF is also the right ordering file.
Pixaprints offers personalised photo printing and photo gifts from uploaded personal photographs. It suits families who want to turn a digitised memory into something they can share or display; the scan still needs careful preparation before upload.
Before submitting your image, check:
- Pixel dimensions: use the final cropped file, not the dimensions of the untouched scan.
- Crop shape: make sure the selected layout does not cut through faces, hands or meaningful details.
- Orientation: confirm that portraits and landscapes face the intended way.
- File version: upload the finished edit rather than a thumbnail or messaging-app copy.
- Preview: inspect every edge, especially where the original included a border or handwritten caption.
A layout preview helps you check placement, but it does not prove that fine detail will print sharply. When a photograph is especially important, check a small reprint before committing to a larger display.
How do you keep the scans organised?
Use descriptive filenames containing the people, place or event when you know them. Mark uncertain information as uncertain rather than turning a family guess into a permanent caption.
Keep scans of handwritten backs with their matching fronts. Store the untouched masters separately from edited copies, and keep another copy in a separate storage location.
For a 2026 family archive, a simple folder structure that everyone understands is more useful than an elaborate system nobody maintains. Include a short note explaining filenames and where the originals are stored.
FAQ
What resolution should I use to scan old photos for printing?
Use 300 ppi as a starting point for same-size reprints and 600 ppi when doubling the original dimensions. Cropping reduces the pixels available, and extra resolution cannot restore detail missing from the original.
Can I scan old family photos with my phone?
Yes, you can copy old family photos with a phone, but alignment and glare need care. Keep the camera parallel to the photograph, use even light and check the full-resolution image before printing.
Should I save scanned photographs as JPEG or TIFF?
TIFF is useful for a lossless master, while a high-quality JPEG is convenient for sharing and uploading. Keep the untouched master and check which formats your printing service accepts.
Should I scan a black-and-white photograph in colour?
Scan in colour if you want to retain sepia tones, paper colour or coloured annotations. You can create a separate black-and-white version afterwards without changing the master.
Can I remove an old photograph stuck to album paper?
Do not pull a photograph away from album paper if it is firmly stuck. Copy it in place where safe, or ask a photograph conservator about handling it.
Can I use a scanned family photograph for a personalised gift?
Yes, a suitable scanned family photograph can become an uploaded image for a personalised gift. Pixaprints offers photo gifts from personal photographs; check the final crop and current upload requirements before ordering.
One last thing
Scan the back as well as the front. A handwritten name, address or dedication can be more valuable to future relatives than a cleaner version of the image alone.
Keep that information with the master, even when you leave it off the reprint. You are saving the story as well as the photograph.